VMWARE Kernel Debugging
How to configure virtual machine for kernel debugging with WinDbg
1) Open the desired virtual machine within VMWARE.
2) Open the Virtual Machine Settings accessible from menu "VM\Settings"

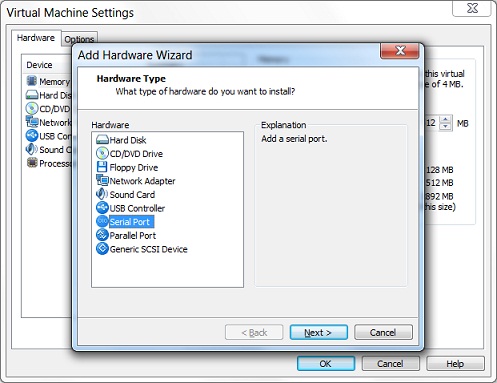
3) Click on "Add", select "Serial port" and click "Next"
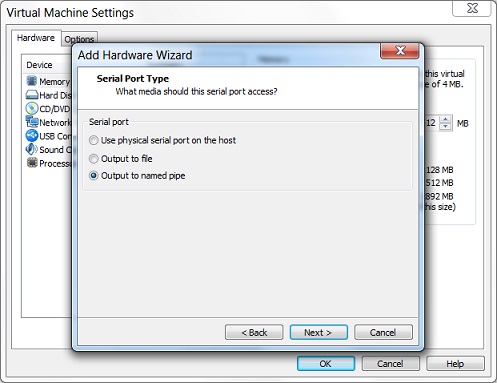
4) On next page, select "Output to named pipe" and click "Next"
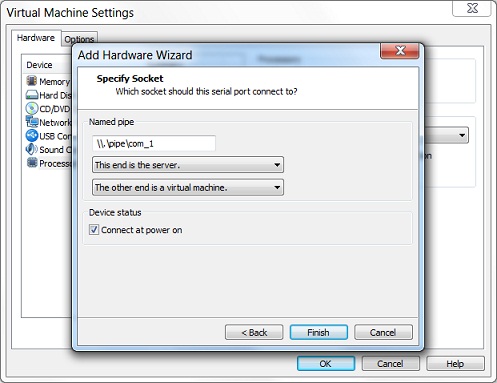
5) Type name of the pipe (or leave default one). Make sure you select "This end is the server" and "The other end is virtual machine". Click "Finish"
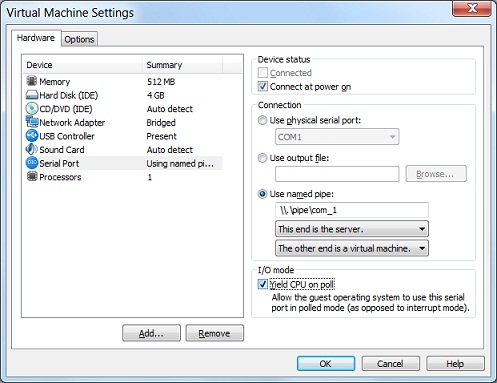
6) After clicking finish, select "Serial Port" and check "Yield CPU on poll"
7) Boot to the virtual machine, and edit C:\boot.ini, so that it contains the following line:
[boot loader]
timeout=10
default=multi(0)disk(0)rdisk(0)partition(1)\WINDOWS

[operating systems]
multi(0)disk(0)rdisk(0)partition(1)\WINDOWS="Microsoft Windows XP Professional" /fastdetect
multi(0)disk(0)rdisk(0)partition(1)\WINDOWS="Microsoft Windows XP Professional" /fastdetect /debug /debugport=COM1 /baudrate=115200
8) After editing Boot.ini, reboot again and stop the boot process at the point where you are supposed to select the boot configuration:

9) From host operating system, run Windbg.exe using the following command line parameters:
"C:\Program Files\Debugging Tools for Windows (x86)\windbg.exe" -b -k com:pipe,port=\\.\pipe\com_1,resets=0
If everything is configured properly, Windbg shows information that it opened the pipe and is waiting for reconnect:

After selecting boot configuration in your virtual machine, Windbg connects to the virtual machine and you can start debugging.
Back to KDVMWARECopyright (c) Ladislav Zezula 2009